


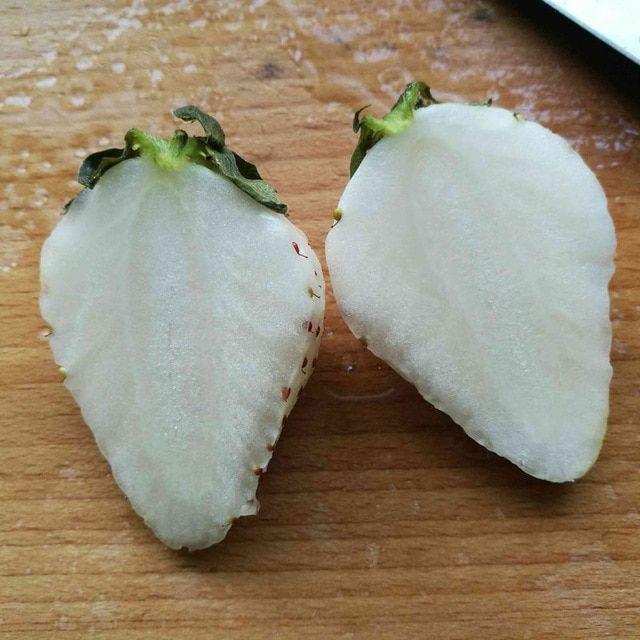
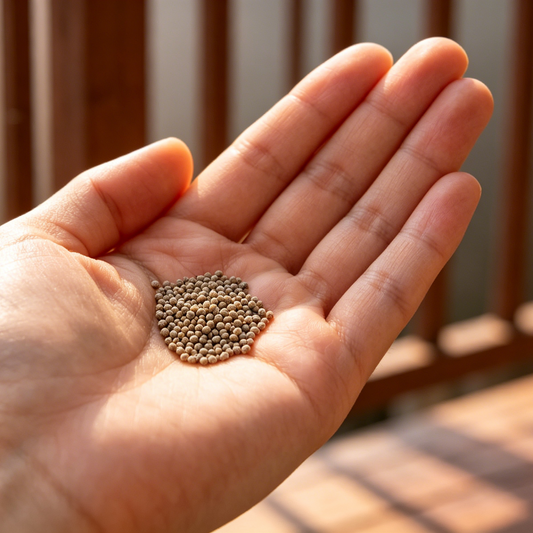
1 Bag Rare Milk Strawberry Seeds
1 Bag Rare Milk Strawberry Seeds
Impossible de charger la disponibilité du service de retrait
-
Ordered
- - -
Order Ready
- - -
Delivered

1 Bag Rare Milk Strawberry Seeds


Buy More, Save More
📦 Add $29.99 to cart → Free shipping
🎁 Buy 3 → Get 1 Free
🔥 Buy 5 → Get 2 Free

Beginner's Gardening Guide
The three most essential elements for seed germination are:
Water: Allows the seed to absorb moisture, activates enzymes, and breaks dormancy
Suitable temperature: A suitable temperature is necessary to initiate growth
Oxygen: Respiration requires oxygen, which provides energy.
Some plants may also have light requirements, but the first three are essential.

⭐The Before You Sow Checklist
Preparation makes all the difference. Get these basics sorted before you sow, and you'll avoid most common pitfalls.
Don’t use garden soil in containers—it compacts when wet, contains weeds, pests and diseases. Choose seed-sowing or quality multipurpose compost instead.We suggest a fine, free-draining, low-nutrient peat-free medium (young seedlings don’t need feeding).
For outdoor sowing, loosen soil to a fine tilth, rake level, and water the day before if dry.

💡How to Sow Seeds Indoors
Indoor sowing lets you start earlier and control conditions easily. Fill containers with compost, level it gently without compacting, then water well and drain.
Sow 2–3 seeds per cell or scatter thinly in trays as directed. Cover lightly with compost/vermiculite (or leave uncovered if light is needed). Label with plant name and sowing date.
Ideal for crops sensitive to root disturbance, such as carrots, parsnips, peas and beans. Prepare fine soil, make shallow drills, sow thinly, cover lightly and water gently. Thin seedlings when they develop true leaves.

📢How to Sow Seeds Outdoors
Ideal for crops sensitive to root disturbance, such as carrots, parsnips, peas and beans. Prepare fine soil, make shallow drills, sow thinly, cover lightly and water gently. Thin seedlings when they develop true leaves.

Pricking Out🌱
When seedlings have true leaves, transplant them into larger pots to avoid overcrowding.Fill pots with fresh compost, make a hole, and water seedlings first for easier lifting.
Lift them gently by the leaves (not stems) and firm compost around roots.Bury leggy seedlings (e.g., tomatoes) up to their lowest leaves.Water lightly and keep out of direct sun for a few days.
Common Problems
Seeds won't germinate: This could be due to using old seeds, incorrect temperature, sowing too deeply, or the compost drying out.
Leggy seedlings: This is a result of insufficient light. Move to a brighter spot, use grow lights or try planting deeper when transplanting.

🍃Hardening Off & Planting Out
Indoor-grown plants need hardening off to adapt outdoors.Place them outside in a sheltered spot by day for a week, bring in at night, then gradually leave them out overnight over another week.
Plant on a mild, cloudy day. Dig holes bigger than root balls, firm gently, water well. Protect from slugs and frost with fleece.
For continuous harvests, try succession sowing: sow small batches of quick-growing crops every 2–3 weeks.
Featured collection
-

 SAVE 50%
Cat's Eye Dazzle Colorful
Prix habituel Du $9.99Prix habituel Du $9.99 Prix soldéPrix unitaire par$19.9850% -
 SAVE 50%
Cat's Eye Dazzle Colorful flowers
Prix habituel Du $9.99Prix habituel Du $9.99 Prix soldéPrix unitaire par$19.9850% -
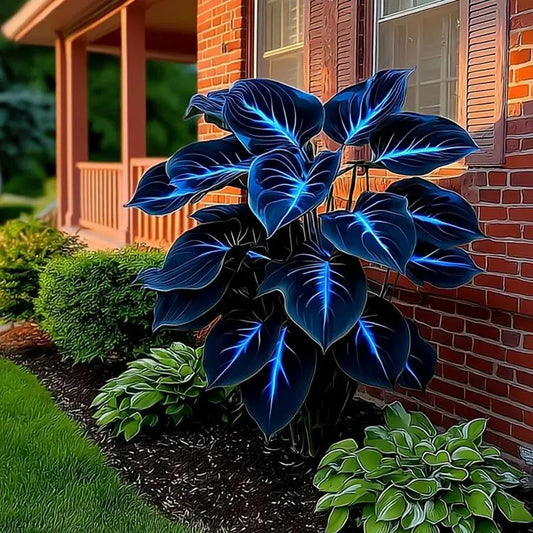
100 Seeds Glow-in-the-Dark Garden Magic: Rare Dark Blue Flame Hostas Seeds
Prix habituel $16.99Prix habituel $16.99 Prix soldéPrix unitaire par$34.9951% -
Butterfly Leaf Hosta Seeds-Unique ResemblingButterfly Wings-Shade-LovingPerennial for Garden Borders& Landscaping
Prix habituel Du $9.99Prix habituel Du $9.99 Prix soldéPrix unitaire par$19.9950% -
For 50 Non-GMO Climbing Silver Jasmine Seeds - Aromatic Evergreen, Ideal Decor Choice for Garden & Balcony Fragrant
Prix habituel Du $8.99Prix habituel Du $8.99 Prix soldéPrix unitaire par$13.9935% -

 SAVE 51%
Color Butterfly Flower Seeds
Prix habituel Du $13.99Prix habituel Du $13.99 Prix soldéPrix unitaire par$28.9951%


Whether you're just starting out or an experienced gardener,
Join us on a gardening journey!
Facebook testimonials
-

1h ago
I’ve purchased flower seeds from other brands before, but none compare to these. Almost every seed sprouted, and the plants are strong and vibrant. Will be a repeat customer!
2.6k
73 Comments
LikeCommentShare -

1Day ago
These flower seeds exceeded my expectations by far. They grew quickly and evenly, and now my garden is full of bright, beautiful blooms. Great quality for the price, highly recommend!
1.7k
52 Comments
LikeCommentShare -

4Days ago
Absolutely love these seeds! They were fresh, easy to sow, and sprouted consistently. My backyard looks so much prettier already, and I’ve gotten several compliments from neighbors.💖💖
2.1k
46 Comments
LikeCommentShare -

2Days ago
I’m genuinely impressed with these seeds. The germination rate was better than I expected — most of the seeds sprouted with proper care and patience. The variety in color is beautiful, and really stand out in the garden.🌸🌺🌷🌻💐
2k
53 Comments
LikeCommentShare -

6h ago
Why did you pick this product vs others?:
I've wanted those flowers for a while. It came in great shape, I planted next day and very fast it's leaves grew and filled out nicely! Happy ♡ 5☆ thank you!1.4k
37 Comments
LikeCommentShare -

12h ago
I planted them this spring. They popped up abundantly and are now climbing the fence in the family plot. They are prolific.
1.2k
29 Comments
LikeCommentShare


-

Shipping within 48 hours
-

Non-GMO Sourced with Care
-

Easy Returns & Exchanges
-

24/7 Friendly Support
